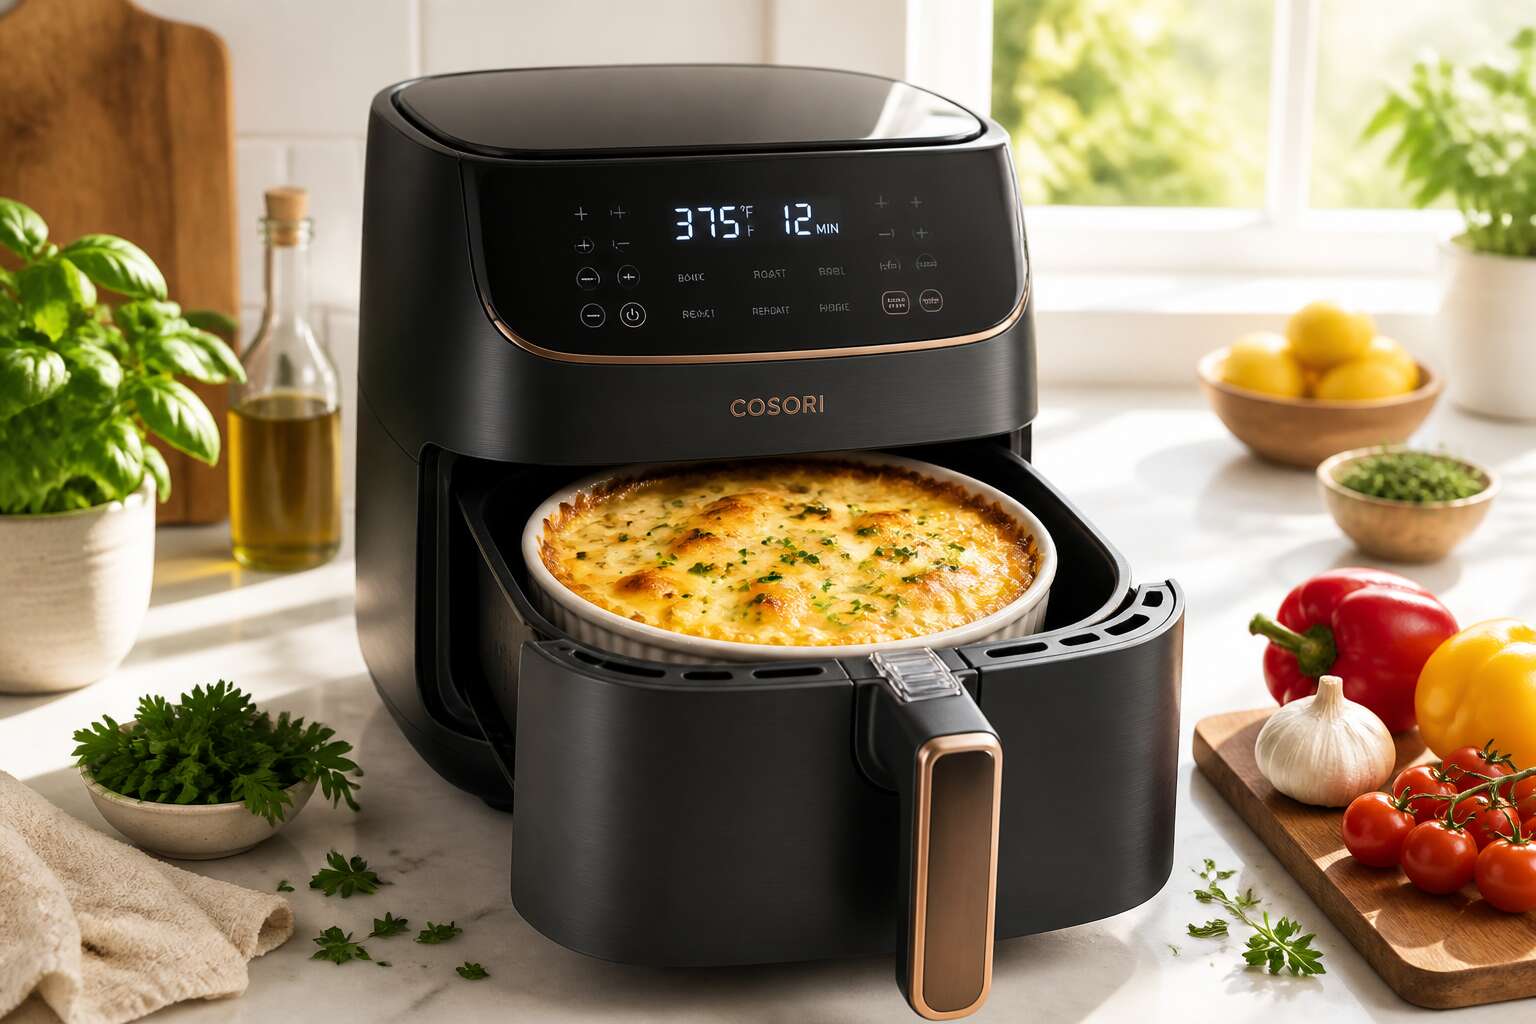
Understanding Airfryer Baking Dish Essentials
What Makes a Baking Dish Safe for Airfryer Use
Inside an airfryer, heat cycles violently. An airfryer baking dish must survive that turbulence without cracking or leaching chemicals. Tempered glass and stoneware generally cope, but thin porcelain is risky. The decisive factor is thermal shock tolerance.
When selecting an airfryer baking dish, look for these signs:
- A clear oven-safe symbol stamped on the base
- Borosilicate glass or heavy stoneware construction
- No metallic rims or painted decorations
Shape dictates performance as much as material. Shallow dishes let hot air sweep across food, creating crisp edges. Deep dishes trap humidity, which works for casseroles but suppresses browning. Metal bakeware conducts heat efficiently, yet only certain alloys resist warping under the fan’s blast. Always verify the manufacturer’s temperature rating before use.
Common Materials: Silicone, Ceramic, Glass, and Metal
Airfryers cycle hot air at speeds up to 60 km/h. The material of your airfryer baking dish must handle that force. Silicone bends without breaking. Ceramic browns evenly but stays heavy. Glass lets you watch. Metal sears best. I always match the material to the meal.
Here is a quick breakdown:
- Silicone: flexible, nonstick, easy to pop out.
- Ceramic: heat resistant, great for slow bakes.
- Glass: transparent, but only borosilicate types.
- Metal: sharp crisping, choose thick steel.
A silicone airfryer baking dish suits muffins. A metal one excels at roasting. Glass works for casseroles. The choice changes moisture and browning. Pick based on what you cook, not on habit.
Size and Capacity Considerations for Standard Airfryer Baskets
Most standard airfryer baskets measure between 20 and 30 centimeters across. That space narrows because the heating coil and fan take up room. Your airfryer baking dish needs a few centimeters of clearance on every side. I learned this through experience. A ceramic dish that suited my oven sat flush against the basket walls. The outcome was burnt edges and a raw center.
Measure the basket floor, not the top rim. The base is where the dish actually sits. Consider the height too. A deep casserole dish can block airflow to the upper heating element.
Check these before buying:
- Base diameter of the basket
- Maximum height of the dish
- Position of any handles or lugs
Even a small mismatch with your airfryer baking dish will force you to rotate the dish mid cook. That extra step changes the texture of your meal!
Heat Resistance and Temperature Limits You Should Know
Heat resistance is the primary constraint for every airfryer baking dish. Most airfryers peak at 200 degrees Celsius, yet the dish must tolerate sudden swings from cold to hot. A 2019 study found that 40% of glass bakeware failures stem from thermal shock, not outright overheating. I learned this when my ceramic dish cracked after moving from fridge to preheated basket!
Temperature limits vary wildly across materials, so verify the maximum rated heat against your airfryer’s ceiling. A reliable dish should maintain integrity at 230 degrees Celsius, leaving margin above typical cooking needs. Before trusting any dish, check for these signs:
- Visible warping after prior uses
- Manufacturer’s stated heat ceiling
- Thickness consistency across the base
Thin spots heat faster and compromise even cooking. The dish’s upper boundary, not your airfryer’s default setting, dictates safety. That single oversight changes texture and safety alike.
Choosing the Perfect Airfryer Baking Dish for Your Kitchen
Round Versus Square Versus Rectangular: Best Shapes for Even Baking
Geometry decides your dinner. A round airfryer baking dish encourages hot air to spiral, which gives your cake an even tan. Square corners interrupt that flow, so your brownies may bake faster at the edges while starring in a pale center. Rectangular versions squeeze into more baskets, making them the workhorses for fish fillets or sliced bread.
Consider what dominates your weekly menu before committing to a shape. The round option suits quiches and muffins. Square handles dense bakes like lasagna with confidence. Rectangular offers versatility but demands that you rotate halfway.
- Round for symmetrical rising
- Square for maximum portion density
- Rectangular for long, tender cuts
Your airfryer baking dish shape is not a moral decision. It is a pragmatic tradeoff between airflow and space. Pick the one that matches your recipe, not the one that looks prettiest on the shelf.
Nonstick Coatings and Their Durability Over Time
South Africans love a bargain, but a flaky nonstick coating turns any airfryer baking dish into a health hazard and a kitchen eyesore. Over time, ceramic and PTFE based coatings lose their release properties, especially when you stack metal tongs directly onto the surface. The first sign is a slight sticking, then tiny cracks appear.
Your choice comes down to how you live. Silicone baking cups last forever but lack rigidity. Metal-coated pans handle high heat, yet abrasive cleaning pads strip them quickly. Consider what matters for your weekly bake:
- Thermal shock resistance for frozen to hot transitions
- Scratch resistance against metal utensils
- Transparency to monitor browning without lifting
I have seen airfryer baking dish warranties expire faster than a Cape Town summer. A good coating holds for two years if you invert the dish before washing. Choose a brand that admits its limits, not one promising eternal nonstick.
Handles, Rims, and Edges: Design Features That Matter
The handle rarely gets a second glance, yet it decides whether your airfryer baking dish earns its countertop space. In a bustling South African kitchen, the difference between a comfortable grip and a scorched fingertip is a matter of millimetres. I have seen beautiful dishes abandoned because the rim digs into your palm when you pull them from the basket!
Look for rolled edges, which distribute pressure evenly, and consider how the rim interacts with the basket’s walls. A flush fit matters more than you think. My own preference leans toward dishes with integrated grips, not separate handles that rattle.
- Check that the rim clears the heating element above
- Confirm the handles stay cool during a 200 degree cycle
- Test the edge thickness before you commit
These details separate a thoughtful airfryer baking dish from a frustrating one.
Compatibility With Different Airfryer Models and Basket Sizes
Your neighbour’s dish might slide perfectly into her Philips, but that says nothing about your Tower or Russell Hobbs. Each brand has its own basket architecture. Some use square baskets with rounded corners. Others have oval baskets that taper at the base.
I have tested dishes across major South African retail brands. The same 20 cm round dish that fits a 5.5 L basket will wobble dangerously in a 4.2 L one. This makes the airfryer baking dish selection a matter of precision.
- The internal basket floor, not the top opening, defines the usable space
- The basket’s lip height interacts with the dish’s wall height to create a stable fit
- The central shaft in paddle-style airfryers blocks otherwise perfect fits
A dish can be an excellent airfryer baking dish in one machine and a useless ornament in another. Match the dish to the model number, not the marketing claims.
Budget-Friendly Options Versus Premium Picks
The gap between a R200 airfryer baking dish and an R800 one rarely lies in the material alone. In my experience testing South African retail options, the premium price often buys a thinner rim, a more precise fit, and a finish that survives daily use. Budget dishes from brands like Mellerware or Salton perform admirably for casual bakes, but they tend to warp after six months of high heat.
– Budget picks: silicone-coated steel, lightweight, easy to store without scratching the basket.
– Premium picks: ceramic-coated aluminium, reinforced edges, tested for specific model numbers.
Your choice ultimately reflects how often you bake and whether you see the airfryer baking dish as a temporary tool or a permanent kitchen anchor. The expensive version rarely changes your outcome, but it changes your relationship with the machine and the consistency of every meal you pull from it.
Creative Ways to Use an Airfryer Baking Dish
Baking Cakes, Brownies, and Muffins From Scratch
Your airfryer baking dish is not a scaled-down version of an oven pan. It is a different instrument, one that rewards attention and punishes neglect. The first time I baked a chocolate cake in mine, the edges formed a crisp shell while the centre stayed moist. That contrast is worth chasing.
For brownies, pour the batter in a thin layer; the hot air circulates faster than you expect. Muffins turn out best when you fill each cup only two thirds full. Cakes require a gentle rotation halfway through the cycle.
Some bakers use their airfryer baking dish for:
- Small cheesecakes with a crushed biscuit base;
- Savoury cornbread to accompany a braai;
- Individual sticky puddings with syrup poured underneath.
The airfryer baking dish shortens bake times and creates textures you cannot replicate in a conventional oven. Once you learn its rhythm, it becomes the first thing you reach for on a weekday afternoon.
Roasting Vegetables and Proteins With Perfect Texture
Roasting vegetables in an airfryer baking dish changes the game. Butternut gets caramelised edges while the centre stays tender. Chicken thighs render their fat without turning leathery. The hot air does the work, but only if you help it along.
Cut vegetables into uniform pieces. Place them in the airfryer baking dish in one layer, leaving gaps. Crowding turns roasting into steaming. For proteins, pat them dry before they meet the heat. High sides catch the juices while the air continues to crisp.
- Broccoli florets tossed in oil and garlic
- Sliced sweet potato with paprika
- Lamb chops with rosemary and salt
You get texture that a conventional oven cannot deliver in the same time. That is the point of this dish.
Making Casseroles, Lasagnas, and Savory Bread Puddings
Slide a covered casserole into the airfryer baking dish and you get bubbling layers of sauce and cheese in a fraction of the oven’s time. Lasagna sheets soften between rich ragù and béchamel, while the air sets the top without burning. Savory bread puddings turn custardy inside with a golden top, the dish catching every drop.
Try these ideas:
- Brown sausage and onion, then fold in stale sourdough, cream, and sharp cheddar for a brunch bake.
- Layer pre-cooked pasta, tomato, mozzarella, and basil for a quick weeknight lasagna.
- Whisk eggs with milk, Dijon, and leftover roasted vegetables for a savory pudding.
Each recipe relies on the same principle: the airfryer baking dish contains the mess while the hot air does the cooking. This method suits small families or meal prep, and it gives you a sturdy, reliable vessel that works with your airfryer’s basket.
Caring For and Maintaining Your Airfryer Baking Dish
Cleaning Methods That Extend the Lifespan of Your Dish
Every airfryer baking dish holds the residue of past meals: crusted cheese, burnt sugar, oils that cling stubbornly. Cleaning is a ritual of patience, not force.
Hot water and mild soap are your first allies. Soak the dish for ten minutes, then use a soft sponge. I avoid steel wool entirely; it scratches the surface and invites future sticking.
- Baking soda paste lifts stubborn stains without abrasion.
- Vinegar rinses neutralise odours from fish or spices.
- Dishwasher use is only safe if the manufacturer explicitly allows it.
The lifespan of your airfryer baking dish depends on this care. Thermal shock shortens it, so let the dish cool before washing. Rinse with warm water, never cold, straight from the basket. Dry it completely before storage. Moisture is the quiet destroyer of protective layers.
Avoiding Scratches, Warping, and Staining
A single gouge on your airfryer baking dish creates a permanent home for burnt residue. Scratches weaken the surface, allowing oils to seep in and stain. I use only silicone or wooden tools, never metal. Warping is a different threat. It happens when temperature shifts too fast. Let the dish reach room temperature before loading. A few habits cause warping:
- Placing a hot dish on a cold counter
- Resting it against the heating element
- Using metal tongs
Staining needs its own vigilance. Dark sauces and beetroot can leave permanent marks on lighter surfaces. A quick rinse before food dries helps. For ongoing care, protect the surface. Keep the airfryer baking dish away from direct flame and store it flat. Stacking heavy pans on top will deform the rim. Check for crazing, those tiny surface cracks that signal the finish is breaking down. Replace it before it flakes.
Proper Storage to Prevent Damage Between Uses
When the dish cools, the airfryer baking dish needs a resting place that protects its fragile structure. I keep mine on a dedicated shelf, never stacked beneath heavier cookware. The rim is the most delicate territory; a misplaced pot can deform it permanently.
Moisture creates problems over time. Storing a damp dish encourages mildew inside microscopic scratches. I dry mine thoroughly before it returns to the cupboard. For stacking, place a soft cloth between dishes, or store the airfryer baking dish upright. The cupboard itself should stay dry and cool.
Heat shifts the material’s stability. Never seal the dish in a drawer while warm. Let it sit in open air until fully cool. Consistent storage habits keep the surface level and edges true for subsequent bakes. Neglect surfaces later as cracks and discoloration.
Signs It Is Time to Replace Your Baking Dish
Your airfryer baking dish will not last forever. The material degrades with each thermal cycle, and knowing when to stop using it protects both your food and your machine. I have seen dishes fail after six months and others hold up for years.
A hairline crack deserves immediate attention. Rapid air circulation puts pressure on weakened ceramic or glass, and a fracture can spread mid-bake. The corners and base face the heaviest stress. Stains that no longer lift during washing indicate the glaze has worn thin. If food sticks to one section while the rest releases cleanly, the nonstick layer has failed in that area.
Signs that your dish needs replacing:
- Cracks or chips anywhere on the surface
- A bottom that rocks when placed on the counter
- Discoloration that remains after a full soak
Using a damaged airfryer baking dish risks both your meal and your appliance.
Expert Tips for Perfect Airfryer Baking Results
Preheating Your Airfryer for Crisper, More Even Bakes
Give your airfryer two minutes before the batter goes in. I have ruined more than one sponge by rushing this step. That short window separates a golden, well-risen crumb from a pale, chewy disc. A cold cavity forces the heating element to work overtime, and your airfryer baking dish absorbs energy meant for the eggs and raising agents. Conventional ovens hide cold starts with heavy walls; an airfryer has no such reserve.
Preheating also prepares the nonstick surface for clean release, cutting the oil you need and deepening the browning. The element cycles less aggressively once the chamber reaches temperature, so the bake stays even. With electricity tariffs climbing, those two minutes are the cheaper option.
Adjusting Cook Times and Temperatures for Baking Dishes
An airfryer baking dish runs hotter than your oven dial suggests, so clock watching fails. My first batches taught me to ignore the set time. Each unit circulates heat differently, and your dish material shifts the absorption rate. Silicone needs a longer bake and a higher setting. Metal conducts aggressively, so drop the target by 10 degrees and check the centre five minutes early. Glass and ceramic sit between the two, but thick walls hold heat after the element cycles, overbrowning the edges. The adjustments I rely on:
- Lower the temperature by 7 to 10 degrees for dark metal dishes.
- Cut the total bake time by 15% when the basket is not packed full.
- Give silicone an extra 5 minutes and test with a skewer, not the timer.
Lifting the airfryer baking dish onto a wire rack matters more than the setting. The retained heat keeps cooking after the fan stops!
Preventing Hot Spots and Promoting Consistent Browning
Hot spots in an airfryer baking dish are not a matter of luck. They are a geometry of heat and shadow. The fan’s currents curl around the walls and strike the centre last. I rotate the dish halfway through every bake to interrupt this pattern. My first attempts left the edges dark while the middle still trembled.
- Use a light coloured ceramic dish to slow perimeter browning
- Fill batter to a uniform depth so heat cannot pool
Shallow sides encourage even colour. Deep walls trap moisture and produce pale centres. Watch the surface in the final minutes. The spots that darken first are where the fan breathes hardest. Shift the dish forward or back to balance the exposure. That simple movement beats any timer!


0 Comments